Installation of PhoneGap on Debian system

I have recently been developing an application for IOS using phonegap. I was extremely fascinated by the simplicity of its usage. In this post, I will guide through a step-by-step procedure to setup phone gap on a Debian system.

Setting Up PhoneGap application on a local system

You will come across the term Cordova often when one talks about PhoneGap. Please note that for most purposes, both are essentially interchangeable. Here, I will give instructions to setup cordova on a Linux Debian system. You can make appropriate modifications for your operating system.

The first step is to install the latest version of cordova on your system. The installation using the Command-Line Interface is extremely straight forward.

1) Install NodeJS on your system from their website.

2) Run the following to install cordova

sudo npm install -g cordova

3) Once cordova is installed, now create a new project. To do that run the following command

sudo cordova create photoFilter com.photoFilter.filter photoFilter

Note: I am calling my example application as photoFilter.

This will create folder called photoFilter in the current directory. The important files to note here are the config.xml file and the www folder. The config.xml file is where you will mention the plugins you are going to use, the various permissions needed for the application, etc. The www folder is the root folder for your HTML, CSS and JS files. If you read the phonegap features, the key feature that lets you develop applications quickly is that you can use web technologies to create a web application. Hence, the entire development of the application will happen using HTML, CSS and JS.

4) We will now add the required platforms on which we wish to deploy the phonegap application on. In this example, I am going to run this application on an android device. Hence, I will just add the android platform. Note, you need to install the android SDK from the android site before performing this step. I will assume that the required SDK is installed on your system.

cd photoFilter
cordova platform add android

Note: The common error while running this command is that your Android SDK may not be set in the PATH variable. Set the appropriate paths and re-try this command. You will now have a folder called android within the platforms folder of your application.

You are now all set to start development of the application.


A Trekking Expedition through the Chandrakhani Pass Part 2

This post is the continuation of the Part 1 of the experience. To read Part 1 please click here.

Day 5- Behali(8300 ft) to Waching(9300 ft)

This was probably the easiest stretch of the trek. We had an estimated time of 3 hours to cover about 5 kms. We had a couple of problems before starting off from Behali. Firstly, one of the participant Ananth had his shoe sole come off. In spite of inquiring around, we couldn’t find an extra pair of shoes for him. So, he just performed a temporary hack by using some glue and rope. The second issue was another participant Prateek fell ill and had high fever. He consumed a lot of paracetamol to help him trek for the remaining journey. After we left Behali, we got to see some glacial left overs on the way. This was our first encounter with ice. After trekking for about two hours upwards, we reached a flat land where we halted for lunch. We were running well ahead of schedule and hence, decided to take a break of atleast 2.5 hours. One particular sport unites everyone in India. And that is the game of cricket. We managed to get a bat and a ball from a local there. The flat land also had a stretch of grass removed. Using that as the pitch, we started playing cricket there. For most of us, it was the highest point at which we have played this game.

cricket


After playing about 5-6 matches of gully cricket, we were quite satisfied and hence, got the enthusiasm to move ahead. After about another half hour of trek upwards, we reached the much awaited camp site at Waching.

This site was again on a completely sloping land. This was also the first campsite where we had no pre-built toilets. Although women still had a pre-built toilet spot, for men it was answering nature’s call in nature’s style. Since, the entire area was on sloping lands, one had to perform a mini-trek to even find a good spot to answer the call. This added to the beauty of this campsite. The other distinctive feature of this campsite was that, at this spot we were completely surrounded by snow-capped mountains on all the sides. A view outside the tent looked like the picture below.

waching


This naturally meant that the nights became extremely cold. One needed to wear gloves and scarf to keep one completely warm. Since, we had an extremely easy trek for the day, everyone had full energy to perform camp fire. We all got together and sang a lot of famous hindi songs. This was also the point where a bit of thrill started creeping in. We were told that the next two days were the most tiring parts of the trek. Also, it would be the days where we would be encountering snow and hail storm. With a hope of enjoying ourselves fully, we went to bed that day night.

The next day morning, Ananth found an extra pair of boots in the camp leader’s tent. With his permission, he took that and now all the equipment related issues seemed to be resolved. But, illness never seemed to stop spreading. The next morning, another girl Preeti also fell ill with high fever. Hence, two people in the group had to do the tougher parts of the trek with fever and cold. But, the motivation in the group was strong that, they eventually completed the trek without giving up.


Day 6- Waching(9300 ft) to Nagroni(10,000 ft)

As we were told, moving from Waching to Nagroni was the start of the tougher parts of the trek. In the words of Mr. Chauhan, it was the “semi-finals” of our trek. The hype created by him was aptly justified since major part of the day’s trek was climbing steep slopes. This drained out our energy very quickly. Also, at some spots in the the journey there was ice patches. This was exciting for most of us since that was what we had been hoping throughout the trek. Fortunately for us, the weather had been good so far in the trek. Apparently, for some groups which came before us, the waching campsite was completely immersed in snow and the entire path from there on was a path on snow. Thankfully for us, we just encountered patches of ice, while the majority of the path was grass and sand.


It took us a complete 6 hours to finish about 3.5 km of trek for the day. This was mainly due to the steep slope on which we were making the climb. After huffing and puffing, by about 4 PM in the afternoon, we reached the highest campsite of our trek – Nagroni campsite. This campsite was situated at about 10,000 ft and was completely surrounded by majestic Himalayan ranges. The view from this campsite was picturesque.

Nagroni


The sheer beauty of the scenery around and the sight of snow-capped mountains nearby pumped up the enthusiasm in all of us. We had an early dinner and an early camp fire, since we had to leave early the next day morning. We were asked to get up by 3 AM and be ready to leave for the next day’s trek by 5 AM. So, by about 7:30 PM we winded up our camp fire(which turned out to be a game of dumb charades) and went into our tents. Almost everyone was waiting for the next day to come. It was the day when we would cross the Chandrakhani pass. And in words of Mr. Chauhan, it was our “finals”.

Day 7 – Nagroni(10,000ft) through the Chandrakhani Pass(12,500 ft) to Nau Tapru(9700 ft)

We promptly woke up by about 3AM in the morning. The moment I walked out of the tent and saw the sky, I saw a beautiful white ring cut across the sky. It was the Milky Way galaxy which was clearly visible in the clear skies of Nagroni camp. The early morning wake was suddenly worth it. With due credits for the photo to Mr. Vijai Kanth Panthayil from CP-29, the sky looked something similar to this

milky_way

By about 5:30 AM all of us assembled, performed the customary head count and left for the day’s trek. The day’s schedule was an hectic one. We were to trek for about 17km through snow and it was estimated to take us till evening 6 PM to complete the trek. With high hopes and immense motivation we started off our journey towards the Chandrakhani pass. Within about half hour of the journey, it started raining heavily making the rocks and the path quite slippery. Soon about an hour later, we hit the first fully snow covered path in the journey. From there on, it was just snow-snow everywhere.

The paths turned to be tricky and adverse. With rain continuously pouring down, it made the paths more and more slippery. At some spots, the ice just caved in. In one of the points, I ended up going knee down into ice, since the layer just caved in. This was an awesome experience. The road winded and and upward slope was quite steep. With help from each other, we slowly made our journey upwards.

At one point along this path, there was slippery mud and snow through which we had to make our trek. I had a momentary slip at this point and by far that was the most scariest moment. With the support of a nearby rock, I gained back my posture and I continued the trek ahead. At this point, the rain had already taken the form of snow and hail-storm. It was the first time I had experience soft pieces of ice falling down on my shoulders. After about another half hour of steep ascent we reached the entrance of Chandrakhani pass.

Enroute_Chandrakhani


Yet another thrilling experience was awaiting us here. There was strong cross winds blowing across since we had reached the top-most point. There was a narrow path of snow on the sloping edge of the mountain. We had the support of a rope for the first 30m or so, beyond which one had to use hands to catch the sloping side of the mountain and walk ahead. The non-mountain side of the path sloped down towards foothills at about 6000ft. Hence, a small slip meant we would go rolling down the slope. This was the moment where we had immense adrenaline rush. We slowly clamped onto the ice with one hand and moved ahead on the narrow path of ice. We had to make a complete circle around the Chandrakhani pass in this manner. The scenes at this point were something which is not describable in any amount of words. And since the trek at this point was quite hard, it was almost impossible to take a picture of this spot. The 10 or so minutes crossing this path was a feeling which made the 5 days of climb, worth the effort.

Since one had to touch snow continuously for about ten minutes, lack of gloves only meant one thing – frost bite. One of the group members Irfan, unfortunately didn’t wear enough protective clothing while crossing the path. Midway through, his hand and legs went numb and he started getting symptoms of Hypothermia. Thankfully, one of the Sherpa noticed it and immediately carried him to the nearest flat spot. He then gave first-aid treatment in the form of transferring body heat. And later, took him downwards towards base camp where the temperatures were comparatively higher. This incident momentarily disturbed some of us since we had never seen such a body condition before.

Once past the pass, the journey now was downhill. We had to walk long distances on ice on flat land and get to an appropriate spot where we could do ice sliding. Ice sliding is a method to descend through ice mountains at a quick pace. It is extremely fun activity and the best part is that doing it wrong will not cause any kind of injury. We walked for about 2 km on ice before we halted for lunch. After lunch, we experienced the longest slide of the trek. This was everyone’s first slide and almost everybody made a mistake. Hence, the postures the body went into while sliding and while halting were extremely funny and we all had a good laugh seeing others slide. The first slide was the biggest of them all. In the photograph below, we started the slide from a part above the topmost visible point and slid down all the way till where people are standing.

BigSlide

Ice sliding re-energized everyone again. Till before this, almost everyone was tired of the ice. The snow started getting into my boots and hence, made my socks wet. I had three pairs of socks on me and the snow managed to get all of them wet. After about 4 such slides at various points, and long walks through flat ice, we could see a canteen in our sight. The frustrating part about walking on ice was that every time you walk normally as you would walk on normal land, you would slip and fall. You needed to groove your feet strongly in ice before taking the next step. Hence, it consumed almost thrice as much energy as walking on normal land. And all the slipping down and falling started to get frustrating after a certain point. It was like a new-born baby learning to walk. Once, we reached the canteen, we were invited with hot maggi, omlette and tea. It was extremely comforting and soothing for the body. We still had about 2 hours of trek remaining for the day from that point. Hence, the break was extremely essential.

After the canteen, we continued our journey ahead. This time there were patches of normal land in between snow and this gave indication of descent. We got the opportunity to perform 2 more ice sliding. Since, we were now accustomed to this act, the sherpas made us go in groups of three to speed things up. By about 6:30, we reached our campsite for the night, the Nau Tapru campsite. After walking through the ice for the entire day, this camp felt like heaven. There was no ice and we were feeling slightly warm! Not a single person had any energy left in him to conduct camp fire. We quickly had our dinner, put our clothes to dry and went off to sleep.

Day 8 – Nau Tapru(9700ft) to SeoBagh Base Camp

This was the last day of the trek and we had already achieved the main purpose – going through the Chandrakhani Pass. It was now time for descending back to base camp. This happened in two phases- First descend on foot till Naggar, HP. And then take a car/bus from there to the base camp near Kullu, HP. The first phase was not as hard the previous day’s trek, but challenging nonetheless. The descent was extremely steep. The path was a mixture of grassland and rocks which made the descent comfortable on the legs. But, the sheer distance and tiredness from the entire trek so far made all of us just want to get back to flat land. I was tired of standing on sloping terrain and wanted to give some comfort to my knees and back by walking on plain lands. The descent by foot was for about 3.5 hours. We had frequent breaks in between. We kept chatting about random stuff and cracking jokes along the way. The one good thing about this trek was that we made a lot of good friends during the process. Everyone shared the same frustration and pain and this helped in getting people closer. The camp fires every night also bridged the gap between us and we were now quite close to each other.

After about 3.5 hours, we came in sight with civilized life. We hired cars to SeoBagh and in batches of about 10 left towards the camp. The journey was for about 2 hours and when we finally reached the spot we were familiar with we screamed our guts out. We had finally completed the trek successfully and were back to place where we had electricity and sheltered toilets !

During the night’s camp fire we were invited individually and were given a certificate of completion by Mr. Chauhan. Our group of 19 had booked bus for 10PM the same night. So soon after camp fire, we took one last group photo. We then exchanged goodbyes and left the base camp towards Delhi. The trek had helped us make a lot of new friends and bidding good bye so soon seemed a difficult task. Since we were among the first ones to leave, the remaining people gave us a grand send off which made us miss the place even more !

Final_Group_Photo


I would like to thank Abhishek, Sachin, Surya and Vishal for the photographs used in this post. I would also like to thank Mr. Vijai Kanth Panthayil from group CP-29 for the special photograph of the Milky Galaxy.


A Trekking Expedition through the Chandrakhani Pass Part 1

This is my first non-technical post on my blog. I going to describe my experiences of the trek through the Chandrakhani pass. This trek was organised by the Youth Hostels Association of India. The post is divided into two parts – The experiences of the first few days in the first post and the experiences of the remaining days in the second post.

chandrakhani     Group Photo


We were a group of 19 people from IIT Madras who set off on our last group trip before graduating from college. The 7 days that followed was filled with fun, adventure and excitement. I will describe a day-by-day account of the entire trek in this post.


Day 0 – Reporting Day

This day was reserved for the participants to arrive at the Seobagh Base Camp near Kullu. This base camp, at any given time, housed 5 groups of trekkers. This is where the orientation and the initial activities took place. This place is about 4 km from center of Kullu town. Plenty of buses ply from Kullu to this camp. We arrived on the morning of May 23, 2014 from Delhi. The journey past Chandigarh, through the hill section, is exotic and is in itself a great scenic treat. After being mesmerized by the beauty of the journey thus far, we just couldn’t contain our excitement when we saw this.

seobagh_bse

Day 0 was a day for participants to arrive and settle down. We did the registration at the desk, got our tent and deposited luggage there. After some rest, some people in the group went to buy woolen clothes and other equipments for the trek from Kullu. Meanwhile, the rest of us played our favourite card game ‘Literature’ or in short ‘Lit’. Note, playing cards is not allowed in YHAI camps; but since this was our first time and we weren’t aware of the rules, we continued playing. The day ended without much drama.


Day 1 – Acclimatization Walk

Day 1 started with a morning 5 o clock whistle for jogging and exercises. Apart from some rare days, where I had the enthusiasm to go for a jog in college, I am not a person who does body exercise regularly. We were asked to jog for about half a kilometer in the cold morning of Kullu. And then about an hour of stretching, bending and other type of exercises. Following this, we went to see-off the group that left for their trek to higher camp that day. YHAI has this tradition of new groups forming a guard of honor to the group that leaves to higher camps and wish them good luck. After having breakfast, we left for our acclimatization walk. We pack the ruck sack given to us with as much weight as possible and then climb a small hill nearby. Once we climb some distance, we get to a really scenic waterfall with cold waters from the glaciers flowing down. This is where the entire group is formally introduced to each other. Every person, gives a small introduction about himself – much like the college ‘interaction’ sessions, only odd thing being, this session is much more polite. Since, these were the early parts of the trekking expedition, people were amused by the waterfalls. We spent more than an hour at the place and clicked a lot of photographs.

waterfall


In the evening of Day 1, we were given an orientation and introduced to one Mr. Parvinder Singh Chauhan. He is supposedly a big person in the YHAI community. He spoke to us about the various other expeditions organized by YHAI in Dalhousie, Goa, etc. Finally, he gave a glimpse of the route we were going to trek through in the coming days. He gave a near-exhaustive list of problems that could arise and some possible ways to tackle them. Fortunately, we didn’t face even ten percent of those during the actual trek. In the night, we had a “camp fire”. This is yet another unique concept of this trek. Every night, all the participants assemble together and perform music, dance, eloquition, etc. This is a way to get the participants of the program even closer. At the base camp, the group that finished its Day 1 of the program performs. Hence, this was our group’s night to perform. We had some splendid performances from various group members. The group of 19, performed “Why this Kolaveri Di? ” which later got us the name “kolaveri boys”, among many other names. We had some good dance and music performance by other members in the group as well. We also, had the group that returned from their trek share their journey with us. This group had one of the toughest weather conditions at Chandrakhani pass. So their experience gave us a slightly tougher picture of the trek than what we eventually encountered. The Day came to an end, with the end of Camp Fire.

Day 2- Rappelling and Rock Climbing

As usual, the day began with the 5 o clock whistle for morning jog and stretching exercises. After seeing off the group going to higher camp, we prepared ourselves to go for rappelling session. As a part of warming up sessions, YHAI organised rappelling and rock climbing sessions for the participants. We went to a nearby hill spot where two guides taught us the basics of rappelling. For people who have done it before, this was a smaller and less exciting version. But, for first-timers this was an awesome experience in itself. I was scared of heights and when I went near the rock, down which we had to rappel, I felt weak in my knees. But once I started descending, the experience felt very good. I was extremely fascinated by the entire rope and the safety process that I stayed by helping people get off the rope once they finished rappelling, for the entire time.


After lunch, we went to our next activity, which was rock climbing. For people who have done any kind of trekking before, this exercise was a mere joke. It was a fairly sturdy rock with lot of grooves. With about 2-3 steps, one could finish the climb. I had previously done wall climbing in Bangalore. Hence, I left without actually completing this exercise. It was getting slightly late and I had still a lot of packing left for the next day’s trip to higher camp. Once we reached the base camp, we were asked to deposit the extra luggage we have and keep only the items which we were talking to higher camps. The volunteers in the camp helped people estimate how much weight they will be able to carry throughout the trek. This process took about an hour until everyone was satisfied that they are taking enough items and the volunteers were satisfied that people aren’t carrying too much weight. The day ended with another Camp Fire. All of us were eagerly waiting for the next day to come. The day when we actually started our trek to higher camps.


Day 3 – From SeoBagh(3500 ft) to Yosgow(7900ft)

Finally, the day of actual trekking had come. On this day we were to move to our first higher camp at Yosgow. This campsite was situated at a height of 7900 ft. This campsite was on the way to a very well-known village in Himachal Pradesh, Malana. This village is very well known for its Marijuana production. Our journey to Yosgow was split into two parts- First a bus journey from SeoBagh to Malana Hydorelectric power plant; Second, walk from this Hydroelectric power plant to the campsite.

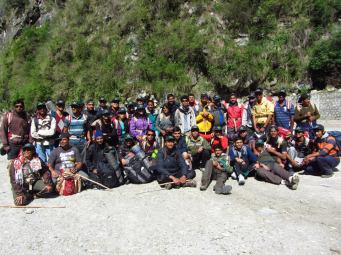
We assembled in the grounds of SeoBagh base camp waiting to go through the guard of honour formed by other participants. Walking through this while others clapping and cheering gave an extreme sense of thrill. It was, as though, we were going on to achieve something extremely incredible. The YHAI members gave us candies and biscuits along with packed lunch for the day’s trek. We got onto the bus and played Antakshari the entire journey. They roads were extremely narrow and there were many blind corner turns. The bus driver was an experienced person and maneuvered the vehicle like a pro. The scenery was exquisite and the greenery was just unbelievable. After about two and half hours of journey, we reached the Malana Dam. This dam was situated at a height of 6000 ft. We assembled here, took a group picture and shouted our customary set of slogans to motivate ourselves.

1) “CP 28 can we make it, CP 28 haan bhai haan”

2) “DJ for gen sec, Pokku Pokku”

3) “Laal Salaam! Laal Saalam! Laal Saalam!”

group_pic_at_malana_dam


YHAI had assigned a local person from Malana village as a guide for us. He showed us the path and we walked along that way. For the next one and half hour or so, the path was motorable and we had no trouble walking through it. It was a road with constant ascent, hence, quite a few of them started losing breath. But soon, people got accustomed to the terrain and were feeling comfortable. We passed through tunnels and bridges along the way. Finally, we halted at a small stream for having our lunch, which was packed and given to us by the YHAI volunteers at SeoBagh base camp. The path soon became a bunch of rocks and we had to slowly step on rocks and continue the journey. The place had unimaginable amount greenery all around. There was a variety of flora and fauna around. The only one I could observe was the marijuana leaves. Besides this, there were other kinds of plants and insects, but unfortunately I have very little knowledge in this domain.

By evening 3 o clock, we reached our campsite at Yosgow. The camp was located on a small flat area of a sloping land. It was perfect for 5 tents and some sitting area. This was surrounded by farms which belonged to the Malana village. Hence, we were told to strictly not step onto any of them. Even for answering nature calls, there were designated spots covered with tent walls. We were asked to go only to those places.  At every camp, we were given a fixed set of drinks in a particular order. On arrival, we were given a welcome drink. Usually, it was one of the ‘Kissan Squash’ drinks mixed and kept before we arrive. We were then served tea followed by soup. Any kind of tiredness during the trek will immediately vanish on having these drinks. The most amazing thing was that, the quality was maintained throughout at all higher camps. We had our dinner and sat down to have our first camp fire away from base camp. Praveen and Suraj were kind enough to explain some star-gazing fundamentals to the group. The clear skies and lack of any obstruction served as a perfect place to look at the various constellations. Star-gazing and discussing about it was such a great experience. It reminded me of the following comic strip from Calvin and Hobbes

calvin-hobbes-star-gazing

After a great discussion on stars and constellations we went off to sleep and thus, ended the Day.

Day 4- Yosgow(7900ft) to Behali(8300 ft)

This was the day when we would pass through the Malana village. This village has a weird history associated with it. People of this village believe that they were descendants of the Great Alexander. They regard everyone who come to their village as inferior. Hence, they don’t let strangers touch their walls and houses. They have boards out there which state -” Photographs or Touching will attract a penalty of 2500 Rupees”. Apart from this, this village is well-known for its marijuana cultivation. This village produces one of Himachal Pradesh’s finest marijuana. In fact, a lot of it is exported to all parts of the country. Having such a history associated with this village, the volunteers at Yosgow camp gave us clear instructions and asked us to stick to the guide when we were crossing this village.

The journey started with a steep ascent on the rocks towards the entrance of the Malana village. This part was tiring and most people took a lot of breaks on the way. This path was also open towards the non-mountain side. Hence, it gave opportunity to do a lot of classy photography. The scenery was perfect for a desktop wallpaper like photo.

malana


We took a brief halt just before entering the Malana village to ensure that everyone has indeed switched off their cameras and other recording devices. Malana village, in every sense, was a typical Indian village. There was garbage strewn all over. The cattle were reared in almost every household. The droppings of goats and sheep left a distinct bad smell throughout. There were children running and playing and some elderly men sitting under a tree and playing cards. There were lots of people smoking in the village but not a single one of them was tobacco. I guess being a major cultivator of marijuana has its own good effects! In about 20 minutes we passed through the village. We were relieved in many ways. Firstly, no more restrictions on touching the walls etc. And secondly, the streets of villages smelled horrible with the garbage and the animal droppings.

Once we got past Malana, it was a road downwards for about half hour. Once again, we stopped near a stream to have our lunch. To our happiness, this time there was a small tent which made Maggi and Omlette. They also sold biscuits and cool drinks. This place turned out to be heaven since we had some variety other than the packed food. Almost everyone had maggi and omlette along with their lunch. At this point there were heavy rains and the place got cold real quick. The distinct feature about these places is that once sunlight is cut, the temperature drops real fast. Direct sunlight is the only source of heat. Standing in the shade of another object for about 5 minutes is enough to bring the chillness back.

We proceeded ahead in the rains towards our base camp. The path was slightly slippery due to the rains and at some points it was unmade. There was a reservoir that was being built in this region and hence, the path was bad. With the help of one another, people slowly made past this and proceeded towards the campsite. The walk was long and hard and at about 4:30 we got the first glimpses of our campsite. And in another 40 minutes we finally reached the campsite. As a custom, we shouted “Fire, Fire, Camp Fire” as soon as we reached the camp.

This campsite was the most scenic in my opinion. The campsite was situated by a fast flowing stream. Towards one side was the majestic view of the Himalayas. Towards the other side was the construction of the big reservoir. The winds in this campsite were particularly strong due to the presence of the stream. This made the nights very cold. The series of drinks we received on reaching and the exotic scenery compensated for all the fatigue during the day.

Behali_camp


The description of the remaining days will be continued in the next part of this post. At this point, I would like to thank Abhishek, Surya, Sachin and Vishal for the photographs used in this post.

Euler Totient Function

In this post I will explain yet another simple number theoretic function, called the Euler Totient Function. This is a simple function which is used indirectly in many problems in programming contests. The function  is denoted as phi(n).  phi(n) basically gives the number of integers greater than 0 and lesser than n+1 which are co-prime to the integer n. In other words, it is the cardinality of the set

S = { a: 1<a<n , gcd(a,n) = 1 }. To calculate this function, we will use a straight forward brute force approach. With a simple analysis, we can show

that the running time of this algorithm is O(sqrt(n)).


- Start with an estimate of the totient function as n
- Iterate for i from 2 to sqrt(n)
- If i | n , we know that all factors of i less than equal
  to n will have gcd with n as atleast i. Hence, they can
 never be in the set S. Hence remove them from the result.
- While i|n, divide n by i.
- After the iteration of i from 2 to sqrt(n),
   if n is a number greater than 1, remove all
   its multiples less than n also from the result

The analysis of this code is similar to  the analysis for prime factorization. Essentially at the core of the algorithm, we are finding prime factors of n and removing all its multiples. Hence the numbers left are the ones that are co-prime to n.

Hence, both correctness and the running time analysis follows from the prime factorization algorithm.

Link to a java implementation.

Number Theoretic Algorithms – Factorization

In the following series of posts, I will write about some of the number theoretic algorithms that one encounters in most of competitive programming. These are fundamental algorithms which most computer scientist should know.

In this post I will post an algorithm and a corresponding JAVA code to perform prime factorization of a give number.

The algorithm to perform prime factorization is a very trivial algorithm and mostly encountered by everyone atleast once in their high school.


- Iterate for i from 2 to sqrt(n)
- While i|n, divide n by i. Report i as a prime factor of n
- After the iteration of i from 2 to sqrt(n),
   if n is a number greater than 1, report that also as a prime factor

The key observation is that, this algorithm runs in O(square root (n) ).

We are able to iterate only upto sqrt(n) since, we can claim one of the following:

1) n is a prime number

or

2) If n has a prime factor p greater than sqrt(n), then there exists a corresponding prime factor p’ lesser than or equal to sqrt(n), such that

p*p’ = n

If (1) doesn’t hold, it implies that n is a composite number. And Let us assume (2) doesnt hold.

This implies for a prime p such that p|n, there is no p’ <= sqrt(n) such that p’|n.

In particular n/p > sqrt(n) . And since p>sqrt(n)

=> 1/p < 1/sqrt(n)

=> n/p <n/sqrt(n) = sqrt(n).

This provides the contradiction. Hence the claim above proves the correctness of the algorithm.

Link to a JAVA implementation of the above factorization.

Floyd-Warshall ‘s All Pair Shortest Path Algorithm

In the previous two posts, I explained two different algorithms to find the shortest path in the graph. In this post I will define another very simple yet important problem in Graph Theory. Its called the “All Pair Shortest Path” problem.

Given a graph G, as a set of vertices V and directed weighted edges E, the aim of the problem is to find the cost of shortest path between every pair of vertices. Cost of a shortest path is defined as the sum of the edge weights in the shortest paths.

At first sight this problem might look really hard to approach. But the following theorem will make this one of the easiest to approach and especially code it.

Theroem:

If A represents the adjacency matrix of the graph, then for an integer k<=|V| , the (i,j) entry in the matrix A^k , gives the shortest path of length atmost k, between i and j in the original graph.

This above theorem can be easily proved using induction on k. I will leave that as a simple exercise.

From the theorem, all that is left to find is the matrix A^n.

A trivial way to compute this would be to do ‘n’ matrix multiplications. This would take a complexity of O(|V|^4).

Instead, Floyd and Warshall gave a Dynamic Programming based approach.

for k from 1 to n:
    for i from 1 to n:
        for j from 1 to n:
            A[i][j] = min(A[i][j],A[i][k]+A[k][j])

The above algorithm has a very simple intuition. The shortest path from i to j can be either the current value, or sum of shortest path from (i,k) and shortest path from (k,j). Instead of calculating this value repeatedly, we will use a dynamic programming approach and calculate once and store it.

The above algorithm has 3 loop each running for O(|V|) time. Hence the overall complexity is O(|V|^3).

A java implementation of the above algorithm can be found here.

Prim’s Algorithm

In the last post, I defined a spanning tree and gave an algorithm called the ‘Kruskal’s Algorithm’. In this post, I am going to describe another algorithm that also helps in computing the minimum spanning tree of a graph. This algorithm is called the ‘Prim’s Algorithm’ . The basic intuition behind the algorithm goes as follows: Firstly, every vertex should be reachable from every other vertex for it to be a tree. So we will try to build the tree by adding one vertex after another into the connected component. Since we want a “minimum” such tree, we will use the edge between the new vertex and the old component, that is of the minimum weight. This intuition is formalized below as an algorithm:

Set ConnectedSet = Pick a random vertex v of vertex set
Set ToBeAddedSet = set of vertices except vertex v
Set ListOfBridgeEdges = Set of Edges

while ToBeAddedSet not empty:
    - Select the minimum edge e from the ListOfBridgeEdges
       such that it has exactly one end in ConnectedSet

    - Add the other end of e to the ConnectedSet and remove
      it from the ToBeAddedSet

Let us now analyze the complexity of the above algorithm:

1) The outer while loop runs for O(|V|) times.

2) Inside each loop iteration, it takes O(|E|) to select the minimum weighted edge such that it has exactly one end in ConnectedSet.

Therefore the overall running time of this algorithm is O(|V| * |E|). And in the worst case |E| is O(|V|^2). Hence, the worst case running time will be O(|V|^3). We can now improve the above algorithm by using a different data structure to store the bridge edges. We will store the edges in a min priority queue(a heap structure).

- Initialise an empty min priority queue Q.
- Store a <key,value> pair in the queue,where key is the comparator for the queue.

- for all the vertices v in V:
    Initialise the key as infinity
    Initialise the value as NULL

- Choose a random vertex v from V.
  Initialise the key as 0.

- Push v into Q
- while Q is not NULL:
     Assign u as the extract minimum from priority queue Q
     for all v neighbour of u:
         if v is present in Q and edgeweight(u,w)< key value of v:
             Assign v->value as u
             Assign v->key as edgeweight(u,w)

Now using the predecessors information present in the v->value, we can build the MST.

Let us now analyse the complexity of this modified algorithm

1) The outermost while loop runs for O(|V|) iterations.

2) For each iteration, the extract minimum from the priority queue takes O(log |V|). Hence the complexity is O(|V| log |V| ) for L13.

3) To analyse the inner loop is slightly tricky. Notice that the total number of times the outer loop + the inner loop executes is exactly 2*|E|. Because each edge is counted twice. Once for each of its end vertices.

4) Each time inside the inner loop, the value of the key is potentially changed. And to insert this back in the priority queue it takes a complexity of O(log |V|). Hence the inner loop overall takes O(|E| log |V|).

Hence, with this modified algorithm, the overall complexity is O(|V| log |V| + |E| log |V|).  And for |E| = O(|V|^2), the algorithm runs in O(|V|^2 log |V|), which is a improvement over O(|V|^3).

A JAVA implementation of the Prim’s Algorithm can be found here.

Kruskal’s Algorithm

I planned to write a serious of posts on working and analysis of some of the basic algorithms. I also planned to give link to a JAVA implementation of the same. I will start off this series by first describing the Kruskal’s Algorithm for finding the cost of the Minimum Spanning Tree in a graph.

Minimum Spanning Tree: A minimum cost spanning tree is a subgraph induced on the original graph such that the induced sub-graph is a tree on all the vertices on the original graph and the sum of weights of the edges on this graph is the minimum among all the possible spanning trees of the graph.

The basic intuition behind the Kruskal’s algorithm is that the least weighted edge of the original graph will appear in the minimum spanning tree. Hence, sorting the edges based on their weight might be a first step in building the spanning tree. Does that mean, the first n-1 least weight edges are sufficient to build the spanning tree (If n is the number of vertices in the graph) ? We also need to ensure that the edges picked for the spanning tree do not form a cycle. Hence, that is the second key observation. The two observations is formalized below as algorithm:

Vector Edges = list of edges in the input graph
Sort the edge list based on their edge weight
Iterate through the sorted list:
    If adding this edge to the MST does not create a cycle:
        Add this edge to the MST
    Else
       Drop this edge and continue to the next edge in the list

The algorithm above can be easily implemented. The only difficult part of this is in line 4. To check if adding an edge will create a cycle. This can be done a subroutine call to a standard search algorithm in the graph, which can detect a cycle.

Let us now analyse the complexity of the above algorithm.

Line 2: O(|E| log( |E| )

Line 4: O( |E| + |V| )

Since Line 4 is repeated O(|E|) times, the overall complexity will be

O( |E|^2 + |E|*|V| + |E| log( |E| ) ) . And in the worst case,

|E| = O( |V|^2 ),therefore this implementation has a worst case complexity of O( |V|^4  ).

We can modify the above algorithm by using a disjoint-set data structure. The working of this data structure can be found here.

Here is the modified algorithm:

Vector Edges = list of edges in the input graph
Sort the edge list based on their edge weight
Iterate through the sorted list of edge E as (u,v):
    Let pu be the parent of vertex u in the disjoint set
    Let pv be the parent of vertex v in the disjoint set
    if pu !=pv:
        Add the edge to the MST
        Make parent of u = parent of v in the disjoint set data structure

Let us now analyse the complexity of this new algorithm.
Line 2: Sorting takes O( |E| log( |E| ) ). This is same as before

The entire loop takes an amortised complexity of O( |E| log( |V| ) ). This is because Line 4 and Line 5, uses the disjoint set find operation.

And this has an amortised complexity of

O( log( |V| ) ). Hence, the overall complexity of the loop is

O( |E| log( |V| ) ). And as before, if we consider the worst case complexity of

|E| = O( |V|^2 ), the algorithm takes O( |V|^2 log( |V| ) ) time.

Here is a link to the JAVA implementation of Kruskal’s Algorithm –

__name__ for Python class and Python function

This is my first post in the series of small random learnings.

The attribute __name__ is by default present in every python function. But suprisingly an object of a class doesnt have this attribute unless specifically specified.


class example():
    def classFunction():
        return "test"

obj = example()
print obj.__name__  #This is an error

On the other hand ,

def functionA():
    return "A"
def functionB(params):
    return params.__name__

print functionB(functionA) # prints functionA

Neo 4J Graph Database

In this post, I will give a brief introduction to Neo 4J database, installation and basic usage with JAVA .

Firstly, Neo4J is a NO-SQL database. It is used to store data in the form of a graph data structure , i.e. a structure having nodes and edges(called relationships) among the various nodes. This form of database finds its use case in many applications such as storing a social network in systems like facebook , twitter ,etc . More information on what Neo 4J can be found here .

Now, coming to the setup of neo 4J graph database. You can download the installation package from the official site here. Save the tar in a local folder and extract the contents. For this post I am going to run a sample code in neo 4j using eclipse(Details about eclipse can be found here).

Open the eclipse IDE and create a new project , say “firstNeo4jApp”. Add a class named graphDb.java in the default package. Now here comes the important step, to add the neo4j libraries to the build path of eclipse.(Improperly configured build path can lead to errors while compiling the code). To add the neo4j libraries , right click on the project name > Build Path . In the window that appears, select libraries tab and click on external JAR. Now, browse to the downloaded neo4j package folder and go to the lib sub folder. Select all the JAR files in that folder and click on OK. Now, refresh the project and the build path will be configured. You will be able to use the neo4j libraries in you code now.

Let us now look at a simple neo4j example.In this example we will see how to create a node ,set relationship between two nodes and how to get the relationship between two nodes.

Creating a Node in neo 4j


public Node createNode() {
	Node n = null;
	Transaction tx = GraphDb.getDb().handle().beginTx();

	try {
		n = this.gdb.createNode();
		n.setProperty("property1", "property1 key");
		tx.success();
	} finally {
		tx.finish();
	}
	return n;
}

Every write operation to the graph in neo4j must be written within a transaction. For this purpose , we will use the interface org.neo4j.graphdb.Transaction. To start a transaction, we will use the beginTx() function of the org.neo4j.graphdb.GraphDatabaseService interface. this interface also provides the function createNode() which creates a node in the graph. We can set numerous properties to the node based on a simple key-value schema. Also, it is important to finish every transaction. The transaction will not release the locks or memory it has acquired until it has been finished.

Set relationship between two nodes

public static void set(Node A, Node B) {
	Transaction tx = GraphDb.getDb().handle().beginTx();
	Relationship relship = null;

	try {
	        RelationshipIndex rolesIdx = GraphDb.getDb().relationshipIndex();
                
                //Creates a relationship between node A and node B  
	        relship = A.createRelationshipTo(B, RelationshipEnum.RELATED);
                
                //Adds special properties to relation; a key-value pair
		relship.setProperty("key 1", "value 1");
                
                //Adds the relationship object to the graph 
		rolesIdx.add(relship, "name", "related");
		rolesIdx.add(relship, "id", relship.getId());
		tx.success();
	} finally {
		tx.finish();
	}
}

public enum RelationshipEnum implements RelationshipType {
		RELATED
}

Again, since a write operation is performed on the graph, we have to enclose it within a transaction. We can also set properties to the edge(or relationship) like in this case, the property is “key 1” and the value is “value 1”. Finally , the Relationship object is added to the graph. We are intentionally storing it as “name”:”related pair and “id”:id pair,so that we can query based on the name property also.

Get relationship between two nodes

public static List get(Node A, Node B) {
	RelationshipIndex rolesIdx = GraphDb.getDb().relationshipIndex();
        
        // Get the edge(or relationship) between Node A and Node B having the key value pair as "name":"related" 
	IndexHits roles = rolesIdx.get("name", "related", A, B);

	List rships = new ArrayList();

	//Convert the IndexHits to a List 
        try {
             
	    for (Relationship role : roles) {
                rships.add(role);
	    }
	} finally {
		roles.close();
        }

	return rships;

}

As for the querying the graph, since no write operation is performed on the graph, hence , there is no need to enclose it within a transaction.

The above pieces of code gave a overall idea of how to create a node , create a relationship between two nodes and get a particular kind of relationship between two nodes. The entire code for all three can be downloaded here .